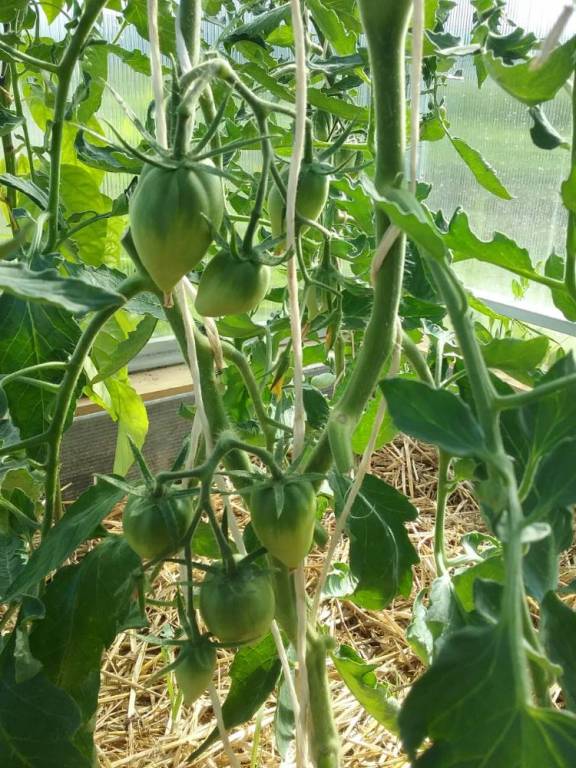
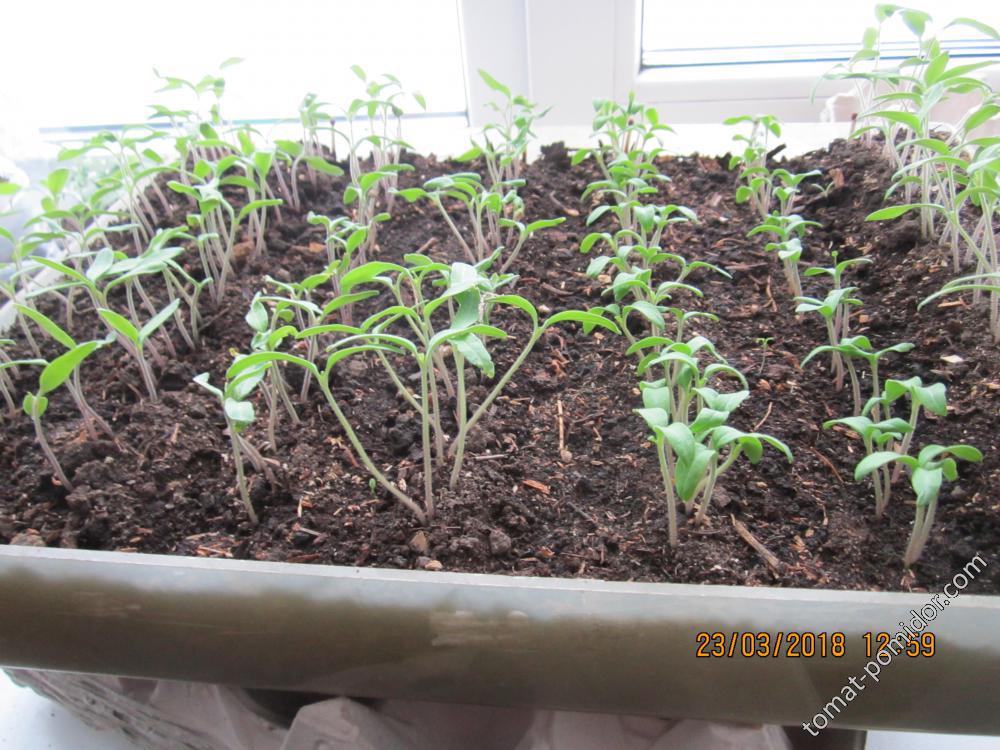
🌱 Quick take: Experienced growers break down their exact schedules and cup sizes for starting tomatoes and peppers indoors. From the debate over starting in 2-3.5 fl oz (75-100 ml) starter cups versus going straight into 16 fl oz (500 ml) solo cups, to whether you should prick out at the early cotyledon stage or wait for true leaves, this diary thread covers the mechanical tricks that keep starts stocky without relying on chemical growth retardants. Photo: Nadezhda 69.
Jump to: Cup Sizes: Starting Small vs. 16 oz Pots ↓ | When to Pot Up: Cotyledons vs. True Leaves ↓ | Controlling Stretch: Lights, Taproots & Horizontal Pots ↓ | Full Summary ↓
Tomato and Pepper Seedling Containers: Sowing, Potting Up, and Preventing Leggy Growth
Cup Sizes: Starting Small vs. 16 oz Pots
I’m trying to figure out my containers for tomato and pepper starts this year. Last season I sowed straight into large 16 fl oz (470 ml) cups. The seedlings were healthy, but looking back now I realize they got leggy. Not a total disaster, but definitely not as short and stocky as I wanted.
This season I want to learn how to prick them out from small starter containers into deeper pots. My question to y’all is: what cup size should I start the seeds in? 1.7 oz (50 ml) or 3.5 oz (100 ml)?
lusi wrote:
what cup size should I start the seeds in? 1.7 oz (50 ml) or 3.5 oz (100 ml)?
I sow into literally whatever clean containers I have lying around. Then I prick them out into 8 fl oz (250 ml) cups. Later on down the line, the lucky ones get upgraded to full 16 fl oz (500 ml) pots.
lusi wrote:
Last season I sowed straight into large 16 fl oz (470 ml) cups…
Lyuda, I always sow into 7 fl oz (200 ml) plastic cups, but I only fill them halfway with mix. As the seedling stretches, I gradually backfill fresh mix right up to the top rim. Once their roots completely take over that soil plug, I pot them on into large 0.7 to 0.8 gallon (2.5-3 liter) nursery pots.
I tested sowing directly into 16 fl oz (500 ml) cups once, but didn’t love the results. With that much initial soil mass, it is awkward to up-pot them later into their final big containers, there just isn’t enough finger room along the edges to tamp down fresh soil firmly around the roots.
This season my first batch for the greenhouse gets sown March 10-12, business as usual in 7 oz (200 ml) cups. But for my second batch (sown around March 20-25), I decided to go straight into 16 fl oz (500 ml) cups. The plan is that they can coast in those cups without an up-pot all the way until planting out in the greenhouse around April 19-20.
If bad weather delays planting until early May, I’ll be forced to pot them on anyway, or just trench them temporarily into the greenhouse beds like our friend Lyudmila does.
Edited January 31 by Tatka
Velesa wrote:
I sow into literally whatever clean containers I have lying around…
I drop 2-3 seeds per cup into small 2.5-3.5 fl oz (75-100 ml) cups. Then I transplant the single strongest seedling into a 16 fl oz (500 ml) cup and keep one backup plant behind in the starter cup just in case.
Edited January 31 by Rolga
Tatka wrote:
This season my first batch for the greenhouse gets sown March 10-12…
Thanks Tatiana! If I have varieties destined for outside garden beds, should my sowing target date also be March 20-25?
Rolga wrote:
I drop 2-3 seeds per cup into small 2.5-3.5 fl oz (75-100 ml) cups…
Olga, I used to sow multiple seeds in one cup too, but thankfully I finally learned to thin out and snip the extras 😁 Otherwise, feeling bad for the seedlings, I used to drown in endless flats of extra plants I never needed! 🙋
You baby them, feed them, pot them on, tie them up, haul dozens of heavy flats out to the homestead, and then end up giving them all away anyway. These days I save my own sanity and pinch off the runts without thinking twice.
If I need two plants of a variety, I sow 3-5 seeds straight into two separate cups so I don’t have to tease roots apart later, and then just thin each cup down to the single best plant.
lusi wrote:
If I have varieties destined for outside garden beds, should my sowing target date also be March 20-25?
For outside garden beds, I never sow earlier than the last week of March, usually March 23-25, and sometimes as late as April 4-5. Sowing earlier for open-ground planting makes no sense in our climate, the seedlings just suffer root-bound stress and age out before the soil ever warms up.
Potting Up at the Emerging Leaf Bud vs. Waiting for 3 True Leaves
Hello to everyone!
Olga wrote:
Tatiana, am I reading this right: you’re planting out 5-week-old seedlings into the greenhouse?
Yep, from that first sowing date, they go in at 5 to 6 weeks old. But by then my starts are absolute monsters 🙋, not because they are leggy (they’re thick and stout), but because they grow ridiculously fast under custom LED grow light setups.
My second round goes into the ground at 4 to 5 weeks old.
lusi wrote:
what cup size should I start the seeds in? 1.7 oz (50 ml) or 3.5 oz (100 ml)?
I sow into 7 oz (200 ml) cups and prick them out one plant per 16 fl oz (500 ml) container. They cruise in those without any fuss right up until planting out in the garden.
Edited January 31 by Nadezhda 69
Nadezhda 69 wrote:
I sow into 7 oz (200 ml) cups and prick them out one plant per 16 fl oz (500 ml) container…
Thanks! How many days after germination do you usually prick them out into those 16 oz cups?
lusi wrote:
How many days after germination do you usually prick them out into those 16 oz cups?
Everybody runs their own program. Old-school growers wait for 2 to 3 true leaves. But there is another school of thought that starts establish faster if you transplant them the second the tiny nub of the first true leaf shows up between the seed leaves (cotyledons).
Personally, I only pot up undisturbed root plugs without bare-rooting. But whenever I have had to transplant extra backup seedlings over the last three years, I do it right as that first leaf bud breaks out.
Tatka wrote:
…the second the tiny nub of the first true leaf shows up between the seed leaves…
At the cotyledon stage they look so tiny and fragile, my hands would be shaking like a leaf and I’d snap every single one of them! 😁
lusi wrote:
At the cotyledon stage they look so tiny and fragile… I’d snap every single one of them!
Nah, you really have to go out of your way to kill a tomato seedling. All you do is scoop under the roots with an ordinary dinner fork, grab the seedling gently by its cotyledon ‘ear’, and lift. They won’t even notice the move.
Halting Seedling Stretch: The Horizontal Pot Trick vs. Growth Retardants
Tatka wrote:
If bad weather delays planting until early May…
Here are two tricks if your planting window gets pushed back by cold weather:
If delayed 10 to 14 days, you can spray with a growth regulator (Athlete).
If you only need to stall them for 5 to 7 days, simply lay the seedling cups down flat on their sides horizontally. That throws their vertical elongation off and halts upward stretch.
DRYGAN wrote:
…spray with a growth regulator (Athlete)… lay the seedling cups down flat on their sides horizontally.
Vadim, I never touch synthetic plant growth regulators or gibberellin blockers.
As for laying pots flat on their sides, that’s a no-go for me, who has enough shelf space indoors to lay dozens of cups horizontal? 😁
AAA wrote:
…grab the seedling gently by its cotyledon ‘ear’, and lift. They won’t even notice the move.
Spot on. Grabbing tender stems with warm human fingers causes intense shock. Plus, a seedling only gets one main stem, but it has two cotyledons to spare.
Tatka wrote:
…starts establish faster if you transplant them the second the tiny nub of the first true leaf shows up…
That is exactly how I do it every season. Zero transplant shock. At that micro-stage, you have the best possible root-to-shoot ratio. Small root systems aren’t overburdened trying to pump water to large sets of leaves, so the seedling diverts 100% of its energy into immediate root expansion.
Plus, the sooner you pinch that central taproot tip, the faster the seedling branches out heavy lateral feeder roots. Tomatoes are practically bulletproof when it comes to root handling, but when your spring calendar is ticking, fast establishment is everything.
DRYGAN wrote:
Plus, the sooner you pinch that central taproot tip, the faster the seedling branches out heavy lateral feeder roots…
Could you explain taproot pinching more? Why do it, and how much do you actually snip off? The whole root or just the tip?
lusi wrote:
Could you explain taproot pinching more? Why do it, and how much do you actually snip off?
Historically, term for pricking out literally meant pinching the very tip off the central taproot. Snipping that tip breaks apical root dominance and forces the plant to send out an aggressive network of fibrous side roots.
Nowadays, folks use the word just to mean moving starts from communal flats into separate cups. I don’t intentionally sit there pinching every taproot by hand, because teasing the roots apart naturally damages the tips just enough to stimulate that same side branching.
I sow 3 to 7 seeds in a 7 oz (200 ml) cup, let them grow until true leaves show, and pot them up one-per-cup into 16 oz (500 ml) containers.
My mother and grandmother always transplanted their flats right when the seedling stems showed their first fine hairs, which lines up right when the first true leaf starts poking through. These days I wait a bit longer until they have some beef on them before moving them into their own private cups 😆
Full Summary: Seedling Cup Sizes, Potting-Up Timing, and Stretch Prevention
- 🪴 Starter Cup Volumes: For sowing, experienced growers favor small 2.5 to 7 fl oz (75-200 ml) cups filled halfway with mix. Filling halfway allows successive soil backfilling around elongating stems, stimulating adventitious root formation before the first major up-pot into 16 oz (500 ml) or 0.75-gallon pots.
- 🌱 Pricking Out Stage (Cotyledons vs. True Leaves): While traditional advice calls for 2 to 3 true leaves, multiple growers advocate potting up at the very first sign of the true leaf bud between the cotyledons. At this micro-stage, the minimal leaf canopy prevents water stress while the seedling redirects energy into rapid root anchoring.
- 🍴 Safe Handling Technique: Always handle delicate seedlings by a cotyledon leaf (“the ear”) using a table fork to gently pry roots loose. Never grab stems directly with bare fingers, which crushes vascular tissue and transmits heat stress.
- ✂️ Taproot Pinching: True pricking out involves nipping the terminal 1/3 of the main taproot to stimulate fibrous lateral root systems. Natural root separation during potting up usually achieves this effect without surgical trimming.
- 🛑 Managing Unplanned Delays: When freezing outdoor weather delays transplanting, temporary stalling can be achieved by laying cups horizontally on their sides for 5 to 7 days (interrupting vertical phototropism) rather than relying on synthetic growth retardants.
Mentioned in this thread by Vadim, Athlete is a common Eastern European consumer product formulated with Chlormequat chloride (CCC). It works by blocking gibberellin synthesis, forcing seedlings to stay squat with short internodes and artificially dark green leaves under low windowsill light.In the United States and Canada, chlormequat is strictly classified as a commercial plant growth regulator (PGR) labeled primarily for ornamental nursery stock (such as poinsettias) and is not approved for home garden edible food crops. Backyard heirloom growers looking to prevent leggy starts should avoid synthetic chemical regulators and instead rely on the mechanical methods discussed above: high-PAR full-spectrum LED bars kept 2-3 inches from foliage, daytime brushing, or the temporary horizontal-pot laydown trick to disrupt phototropism.