How to Keep Your Dahlia Tubers Alive Through Winter
Successfully saving your harvested dahlia tubers until spring is a huge challenge for many gardeners. Everyone has different storage conditions—and some have no proper storage space at all. The easiest and most common method is simply tossing the dug-up tubers into a crawl space or root cellar. Come early spring, the tubers start to sprout, and they are brought out into the light. However, this method is full of nasty surprises: gardeners often open their storage only to find tubers that have completely rotted into mush or shriveled up into dry mummies. Because of this, flower growers test out numerous alternative, more reliable methods every year, searching for that one perfect method that fits their specific environment.
Proper Harvesting and Prep
For tubers to store well, they must be dug up at the right time — fully mature but before severe hard frosts can damage them. When digging, the most critical thing is to protect the “eyes” (buds) located on the crown of the tuber, right at the base of the stem. In autumn, these eyes can be tiny and almost invisible. Don’t worry about accidentally slicing the lower half of a tuber with your shovel; there are no eyes down there anyway, and you’ll likely trim the tubers before storage regardless.
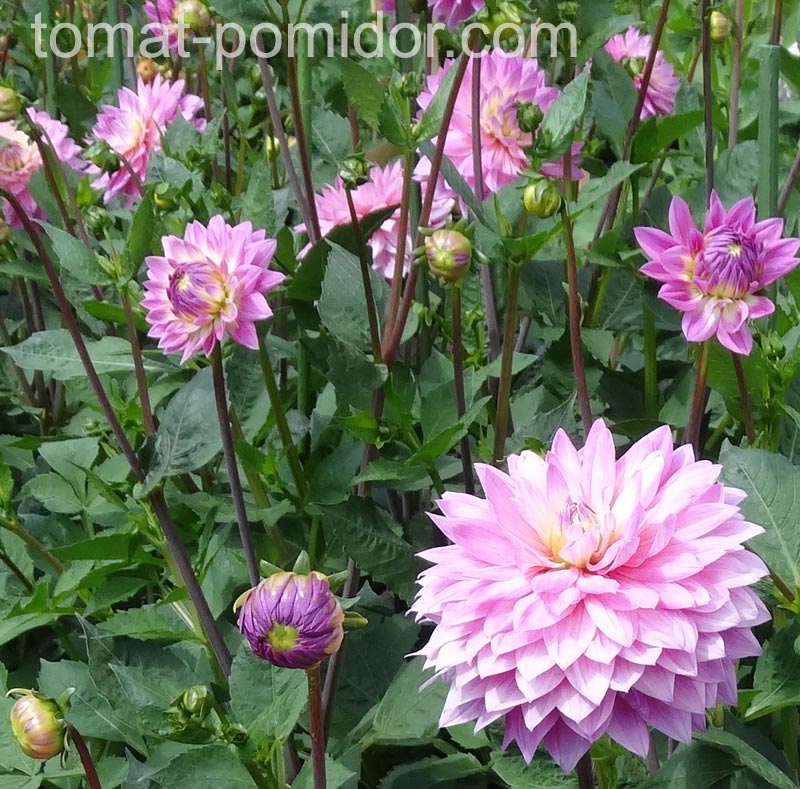
Many growers try to store massive tuber clumps completely whole and undivided. But if you plant them whole in the spring, they struggle to form good roots and new tubers. Plus, dividing woody, hardened tubers in the spring is much harder than doing it in the fall. Therefore, it’s best to divide them immediately after digging. Each divided piece must have a piece of the crown with dormant eyes, and at least one tuber attached below to feed those eyes later.
Trim away excess hairy roots and the old “mother” tuber. Cut out any rotting parts, suspicious rust or brown spots (early signs of disease), and hollow tubers. You must also completely remove the remaining stalk down to the crown. The hollow stem is exactly where rot usually starts if the humidity gets too high. You can treat the fresh cuts with a fungicide or brilliant green (an anti-fungal dye popular in Eastern Europe).
Important: After cutting away diseased tissue, you must disinfect your cutting tool with rubbing alcohol or a lighter flame. If all parts are healthy, disinfection isn’t strictly necessary.
Wash the divided tubers — preferably with a gentle spray from a hose, using a soft brush to remove dirt clumps. Next, soak the tubers in a strong solution of potassium permanganate or a commercial fungicide. If any tiny tubers float to the top, throw them away; they are too hollow to survive the winter and will just dry out.
Dust the fresh cuts with wood ash or a powdered bio-fungicide. Lay the washed and treated tubers out to dry. The thinner the tuber, the less time it needs to dry — anywhere from 2 to 4 hours up to a full day, just enough for the skin to slightly cure and the wounds to seal up. Label your varieties using plastic or metal plant tags, or simply write directly on the dry tuber with a permanent marker or ballpoint pen.
Conditions and Temperature
Now it’s time to pack them away. You need a cool room with a temperature of 3–7°C (37–45°F), averaging around 5°C (41°F). The temperature must be stable, with no wild swings, and the air humidity should be around 60%. This could be a root cellar, an insulated balcony, or a cool hallway.
To maintain consistent moisture, pack the tubers in a storage medium: sand, coarse wood shavings/sawdust, peat moss, vermiculite, pine needles, or sphagnum moss. The golden rule is that the medium must be DRY. You can place each tuber in a paper bag or a cut-off plastic bottle, layering them thinly with your chosen medium. You can also stack them in wooden crates or plastic baskets, lining and covering them with newspaper.
When packing, try not to let the individual tubers touch each other to prevent rot from spreading. Also, it is highly recommended not to store dahlias in the same room as potatoes.
Check on your tubers periodically during the winter. Check the humidity, temperature, and overall condition. If they look shriveled, you can lightly mist them with water. If you spot rot, cut it out and let the wound dry. If they start to sprout around early March (or due to an accidental temperature spike), bring them into the house or a greenhouse and grow them like regular seedlings so they bloom earlier in the summer.
To save a particularly valuable variety, growers often take cuttings. Spring cuttings root much easier than autumn ones. Sometimes, a rare exotic variety will fail to form any new tubers over the summer. If that happens, dig up the rooted stem in the fall, plant it in a pot, and keep it growing on a windowsill until you can plant it outside next spring.
Alternative Storage Methods
Before storing, some growers dip their tubers in a clay slurry to protect them from drying out. This is especially useful for very thin, stringy tubers (common in single-flowered varieties). Waxing is also popular: you quickly dip the tuber into melted (but not boiling) paraffin wax on a hotplate, then immediately plunge it into cold water to set the wax. Waxed tubers can be stored at slightly higher temperatures, but they can be harder to wake up from dormancy in the spring.
Lately, the cling wrap (Saran wrap) method has become incredibly popular. After dividing, washing, and treating, the tubers are tightly wrapped in plastic food wrap, leaving absolutely no air pockets. No breathing holes whatsoever. Storage at the required 5°C (41°F) is excellent, but only if there are no temperature spikes. If the room gets warm, condensation will form inside the plastic and completely destroy your tubers. The beauty of this method is that the tubers take up very little space (you can even keep them in the crisper drawer of your fridge), you can easily see their condition through the clear plastic, and they never touch each other.
— Written by Svetlana F.
Grower Comments & Experiences:
Storing in sphagnum moss was a tragic experience for me. Last autumn we packed them in this moss, and by spring we were in tears! The roots dried out and shriveled up so badly that no amount of soaking could revive them.
Please recommend a truly reliable method!
Wrap each tuber tightly in cling wrap (Saran wrap) and toss them in the fridge or a root cellar.
I would like to know — has anyone ever treated their dahlia tubers with boiled linseed oil before storing them?
I have tried several methods for saving dahlia tubers over the winter. The most acceptable one for me, in terms of survival rate, is storing them with the dirt clump intact.
I dig up the dahlias and, without shaking off the soil, place the entire clump into a plastic trash bag. I leave the bags on the open terrace for a few days to dry out a bit. Then I take them down to the crawl space. I leave the bags open. I check on them periodically during the winter to make sure they aren’t sprouting.
I tried storing them in cling wrap. Hated it. Almost all of them ended up in the trash. I tried the wax method. Didn’t like it either. It is a highly labor-intensive method, although the results were good (and they are easier to plant in the spring).
How do I plant the ones saved in the dirt clump? I take them out when it’s warm enough to divide them outside. If you try to divide them inside the house, no matter how hard you try, it will be a muddy mess 😄. I do not recommend planting them undivided. They bloom worse, and you have to dig a massive hole for them.
I also store them in large bags, and I pour sawdust at the bottom. I don’t wash the tubers, and I don’t divide them in the fall. I just shake off whatever loose dirt falls off naturally, dry them slightly, put them in a bag, tie it loosely, and put them in the root cellar.
I do all the actual work in the spring: I remove rot if any appears, and divide them into individual plants—they separate much easier than they do in the autumn. I never cut off the old “mother” tubers; I consider them to be the food reserve for the plant all winter and until new roots form.
I don’t have a root cellar, but I have about 20 varieties of dahlias. I store them in large cardboard TV boxes in the communal hallway outside my apartment.
Here’s what I do: I dig the dahlias up, and without shaking the dirt off, I dry them. Then, keeping them undivided and with the dirt clump intact, I pack them into the boxes. Between the tubers, I place open bottles of water, and then I completely seal the boxes tight with packing tape. Previously (without the water bottles), the tubers dried out terribly and my loss rate was 50/50. Now, out of the entire batch, only two or three pieces dry out.
MarinaSt said:
I store them in large cardboard TV boxes in the communal hallway outside my apartment…
I can also confirm that when I stopped cleaning off the dirt and washing the tubers — all my beloved flowers started surviving the winter alive and healthy. At the end of November, I cut the stems to 10 cm (4 inches) above the ground, dig up the bush with a pitchfork, try not to damage the tubers, and very carefully, so the dirt doesn’t fall off, I transfer the whole thing into 20-liter (5-gallon) buckets — one variety per bucket. For smaller bushes, I use 10L buckets, and patio dahlias I just leave in the pots they grew in (I just cut off the greens).
I leave them under a canopy in the garden so the cut parts can dry well. I sprinkle the cuts with crushed charcoal or just paint them with brilliant green (antifungal dye). When I see that nothing is rotting and they are looking perky — I move the buckets into the cellar. That’s it, they winter there. In early March, I pull them out, wash the roots free of dirt, take them to the greenhouse, lay them out on wet coco coir, and wait for the magic to happen 😊.
By the way, I do the exact same thing with calla lilies, cannas, caladiums, gloriosa, and basically anything with tubers, even montbretia and acidanthera, which then bloom much earlier as a result. It’s beautiful! 👍


Alexandra_CZ said:
I can also confirm that when I stopped cleaning off the dirt and washing the tubers — all my beloved flowers started surviving the winter alive and healthy…
Good afternoon. The photos of your dahlias brought back childhood memories. My parents had a wonderful collection of dahlias, which was actually started by my grandmother. I still vividly remember the “Yellow Monk” — huge and lush, and the delicate pink “Madame Samier”.
My mom stored them “like potatoes”. Down in the crawl space, she would shake off some dirt, and they just lay right there on the dirt floor. In the spring, she would divide the ones that had grown too big. I don’t grow dahlias myself (unfortunately, perhaps). I am more into roses now. 🌺
Thank you for the kind words! I love roses too, and I only have a few dahlias since I lack the space 😅 I really want those fuzzy white ones with the split tips (I think they belong to the Karma group), but I haven’t figured out where to plant them yet. Once I cut back on my tomatoes, I’ll think about it!
By the way, you are totally right about the storage. In the old days, they stored potatoes in dirt cellars — it was the ideal environment for them, cold and damp. But my modern basement is dry and warm. Without the dirt, the tubers just dry out to a crisp. You can’t haul enough sand down there to keep them moist, and you have to keep wetting the sand anyway. But the original dirt clump creates a sort of protective shell/crust around the tubers, and they survive perfectly. In the spring, the shell is so hard you have to soak them just to break it apart!