Quick Summary: The “Hot Bed” Seedling Method
- 🌍 The Concept: A traditional Siberian method for growing tomato seedlings entirely outdoors, even in harsh, extreme climates (like Tyumen in Western Siberia, USDA Zone 3). This eliminates the need for expensive indoor grow lights and prevents transplant shock completely..
- 🔥 How it Works: A raised bed is filled with 12 inches (30 cm) of raw organic matter (grass, leaves, stems) and topped with 8 inches (20 cm) of soil. As the organic matter breaks down, it acts as a heater from below.
- 🍼 The Double-Cover System: Seeds are sown directly into the warm soil in April. They are covered with cut-off 1-gallon (5L) plastic water jugs (acting as mini-greenhouses/cloches), which are then covered by glass window frames and a frost blanket.
- 💪 The Result: The seedlings grow incredibly stocky, robust, and cold-hardy (often developing a purple tint from the cold). By planting time in June, they are already fully hardened off and forming flower buds.
My Hot Bed for Tomato Seedlings
I often get asked questions about my hot bed method. Therefore, even though there is already an article about this, I decided to share my personal experience of growing tomato seedlings outdoors in a hot bed.
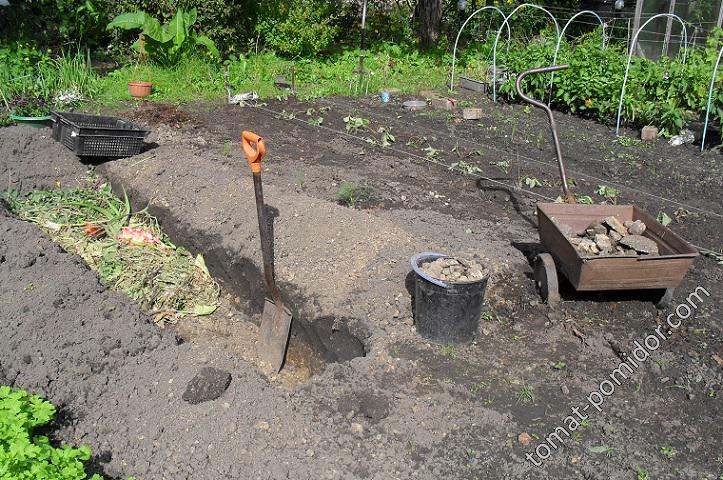
I prepare the beds in the fall. But if you didn’t have time, no problem. A spring prep will also help you grow seedlings without unnecessary hassle. We prepared tall raised bed frames, which need to accommodate 30 cm (12 inches) of organic matter, 20 cm (8 inches) of soil, and accordingly, some vertical space for the seedlings to grow.
I set the height based on a 5-liter (1-gallon) plastic water jug. It comes out to about 80 cm (32 inches) total. Above the soil line, I line the inside of the frame with thick plastic film or landscape fabric to prevent cold air from blowing into the bed. At the level of the organic matter, gaps in the wood aren’t scary. On the contrary, oxygen access allows the organic matter to “burn” (compost) more actively.
Spring Activation & Sowing
We fill the bed with organic matter in the fall. As soon as the spring sun warms up and the snow melts, I water the organic matter heavily with hot water. Then I cover the bed with old glass window frames (acting as a cold frame). The organic matter starts to steam and generate heat. At this point, I add the layer of topsoil. I water the soil layer as well, and cover it with the glass frames again.
As soon as the soil temperature rises above 10°C (50°F), I sow the tomatoes. For the third year now, in our climate (the Middle Urals), this happens around April 20–21.
I make small depressions in the soil, matching the diameter of the plastic bottle that will be placed over it. I slightly compact the soil, place 4-5 seeds in each hole, and water them with warm water mixed with a pinch of potassium permanganate (a light pink solution for fungal sterilization). Then, I cover the seeds with about 2 cm (0.8 inches) of soil. I compact the top layer slightly as well—this prevents the seedlings from emerging as “helmet heads” (with the seed coat stuck on the leaves).
The Triple-Layer Protection System
I cover each seeded spot with a cut-off plastic bottle (with the screw cap on). On top of the wooden bed, I lay the glass window frames. If it is very cold outside, I add a layer of spunbond frost blanket (row cover) right over the glass. Even a lightweight 1 oz (30 g/m²) frost blanket has proven to be very effective. To let more light in, I remove the frost blanket during the day. This setup allows maintaining a much higher temperature inside the bed.
Before the seedlings emerge, I only remove the frost blanket for the day, and put it back at night (and only if freezing temperatures are in the forecast). After the seedlings emerge, I remove the glass frames during the day and unscrew the caps from the plastic bottles for ventilation. I don’t touch the bottles themselves. By this time, it is usually warmer outside, so I leave the bottles without caps, but I still cover the bed with the glass frames and frost blanket at night. During the day, I just slide the glass frames slightly open for airflow. (You can replace glass frames with polycarbonate sheets or greenhouse plastic).
Results: Zero Transplant Shock
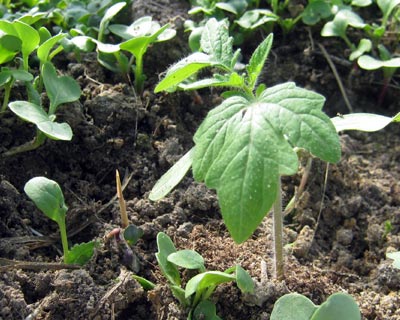
By mid-May, the plastic bottles can usually be removed entirely. The seedlings grow incredibly strong, stocky, and robust. I transplant these one-month-old seedlings into their final garden spots in early June. The amazing thing is that all the seedlings already have flower buds. The bushes are not leggy; they are thick and healthy. They are fully adapted to the outdoor weather conditions.
Because from mid-May onwards, I only cover them with the glass frames at night. And for a week or ten days before transplanting, I leave them completely open even at night (I monitor the night temperatures, naturally. If it drops too low, I cover them). After transplanting them into the open ground, the seedlings look “sad” for literally only one day. No need for sun shades or transplant shock covers. The rest of the care is just as usual.
My hot bed is 1 meter wide and 3 meters long (approx 3 ft x 10 ft). Five bottle-holes fit across the width, and fifteen along the length. Thus, 75 varieties fit into one bed. Four or five seeds per variety. That’s a minimum of 300 seedling roots.
Experimenting with Extreme Cold
Last year, I didn’t have enough hot beds. I sowed some seeds simply into a raised wooden box. The soil was well-amended with compost, but I didn’t have enough plastic bottles. I covered the box only with glass frames and a frost blanket. The seedlings grew and survived all the cold snaps. From the cold, they sometimes turned completely purple (phosphorus lock-out from cold). Not all bushes had buds. But even so, they pleased me with an excellent harvest.
I left the smallest bushes right there in that bed permanently, and I didn’t regret it. The harvest was no worse than what the same small bushes yielded when transplanted into the pepper greenhouse.
My mother inspired me to use this method of growing seedlings. She grows the earliest, most unpretentious varieties this way. For me, even the late-season varieties yielded two or three trusses of fruit. Of course, the last ones have to be picked green before the frost. But in our climate, we have to resort to ripening tomatoes indoors anyway. One hundred seedlings that I grew traditionally indoors in the house got hit by a late frost after transplanting. Yet even they managed to produce a harvest from their suckers later on.
As an ongoing experiment, I sowed some tomatoes directly into the open ground garden (no raised bed). They were sown on May 8th and covered only with plastic bottles. Germination was, of course, delayed. The last ones sprouted by early June. But the bulk of them emerged by May 20th. By mid-August, the earliest ones started ripening right on the bush.
This method greatly simplifies the care and cultivation of seedlings in any case. Of course, it is best suited for those who live on their property and are always near their beds. Even in our cold climate, if you have a good greenhouse, this allows you to grow tomatoes using a completely “no-transplant” direct-sow method. Sown in late April and covered just like in a hot bed, they will delight you with an excellent harvest with minimal labor costs.
Community Comments & Discussion
I also had to grow them in a hot bed last year out of necessity. Something ate my tomato seedlings on the windowsill. Ate all the top growth. So I had to improvise. I planted the chewed-up leftovers in one bed, and in another bed (0.5m x 2m), I direct-sowed seeds. And you know, they yielded a harvest only a few days later than the indoor ones! I just didn’t think of covering them with plastic bottles. This year I will sow them directly again, but with the bottles. And I’ll only sow a tiny bit indoors just in case.
Vera, what a great master class! And the organic matter – is it mostly fresh green grass, I assume, so that it “burns” and heats up well? If it’s just dry autumn leaves, it wouldn’t generate heat like that, right?
Quote by Katya:
And the organic matter – is it mostly fresh green grass, I assume, so that it “burns” and heats up well?
Katya, I put absolutely everything in there. Both grass, and leaves, and garden plant debris from the fall. I just layer the “greens” with dry straw and hay (browns) to get the composting process going.